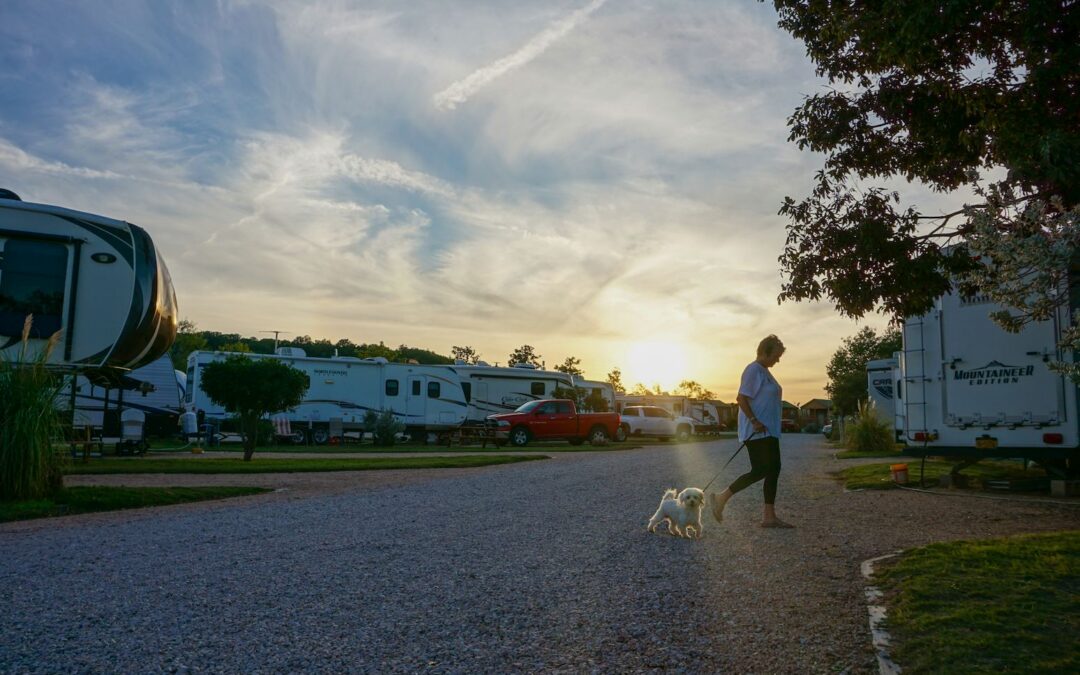
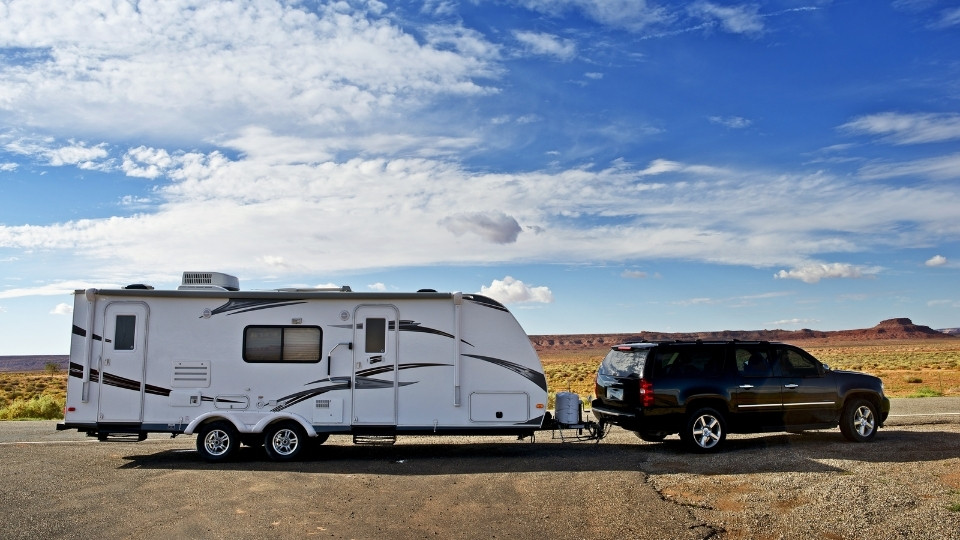
Most travel trailer accessory lists dump forty items in no particular order, so new owners either buy everything at once or show up at their first site missing what they need to hook up water. Some of this gear prevents real damage to the trailer or the site’s utilities. Some just make camp life easier. Very little of it is optional in the sense the word usually gets used.
This guide sorts all 25 accessories into three tiers: what to buy before your first trip, what to add after your first few trips, and what’s a genuine comfort upgrade you can wait on. Buy in that order and you’ll never show up to a full hookup site without what you need to connect safely.
The Three Tiers

Every item gets tagged with one of three tiers, and the tier matters more than the category. A fire extinguisher and a set of camp chairs might both live under “site setup,” but only one keeps you safe.
- Tier 1, buy before your first trip. These aren’t optional. Without them you can’t safely hook up power, water, or sewer, or safely tow the trailer down the highway.
- Tier 2, buy within the first few trips. These protect the trailer or the site from wear and hassle you’ll notice by your second or third stay, even if nothing goes wrong on the first one.
- Tier 3, comfort and quality of life. Real upgrades to how camp feels, but nothing breaks or floods if you wait on these.
Here’s the full list at a glance before the category-by-category breakdown below.
Quick Reference: All 25 Accessories by Tier
| Accessory | Category | Tier | What It Protects |
|---|---|---|---|
| RV surge protector or EMS | Electrical | 1 | Electrical system from pedestal spikes, reversed polarity, open ground |
| Dogbone adapters, 30-amp and 50-amp | Electrical | 1 | Connection when cord and pedestal amperage don’t match |
| RV power cord + heavy-duty outdoor extension cord | Electrical | 1 | Reaching a distant pedestal safely |
| Cordless drill with socket adapter | Electrical | 2 | Time and effort cranking stabilizer jacks |
| Drinking-water-safe (potable) hose | Fresh Water | 1 | Drinking water from chemical leaching |
| Water pressure regulator | Fresh Water | 1 | Plumbing from high pedestal water pressure |
| Inline water filter | Fresh Water | 2 | Water taste and sediment |
| 45-degree hose elbow and Y-splitter | Fresh Water | 2 | Inlet fitting from kinking and cracking |
| Sewer hose kit, 15–20 ft, locking bayonet fittings | Sewer & Sanitation | 1 | Secure, sealed waste transfer |
| Clear elbow with 4-in-1 dump station adapter | Sewer & Sanitation | 1 | Confirms tank has fully flushed |
| Sewer hose support | Sewer & Sanitation | 1 | Hose from pooling, odor, clogs |
| Disposable nitrile gloves | Sewer & Sanitation | 1 | Hands during sewer handling |
| RV-safe toilet paper and black tank treatment | Sewer & Sanitation | 1 | Tank from clogs and odor buildup |
| Black tank flush wand or built-in flush connection | Sewer & Sanitation | 2 | Tank walls and sensors from solid buildup |
| Leveling blocks | Leveling & Stabilization | 1 | Frame and appliances from being off-level |
| Wheel chocks | Leveling & Stabilization | 1 | Trailer from rolling while parked |
| X-chocks or tire locking chocks | Leveling & Stabilization | 2 | Reduces side-to-side rocking |
| Jack pads and stabilizer blocks | Leveling & Stabilization | 1 | Jacks from sinking into soft ground |
| Tire pressure gauge, plus TPMS if budget allows | Towing & Road Safety | 1/2 | Tires from blowout risk |
| Torque wrench and trailer-specific lug wrench | Towing & Road Safety | 1 | Lug nuts from under- or over-torquing |
| Roadside emergency kit | Towing & Road Safety | 1 | You, during a roadside breakdown |
| Weight distribution hitch with sway control | Towing & Road Safety | 1, conditional | Tow vehicle and trailer from dangerous sway |
| Outdoor rug or patio mat | Site Setup | 3 | Interior from tracked-in dirt |
| Camp chairs, folding table, string or step lighting | Site Setup | 3 | Comfort and evening visibility |
| Portable grill and collapsible trash container | Site Setup | 3 | Cooking space and site cleanliness |
Electrical Hookup
Park pedestal power isn’t as clean or consistently wired as household power, so this gear protects against amperage mismatches, wiring faults, and voltage spikes the park can’t always control.
RV Surge Protector or EMS
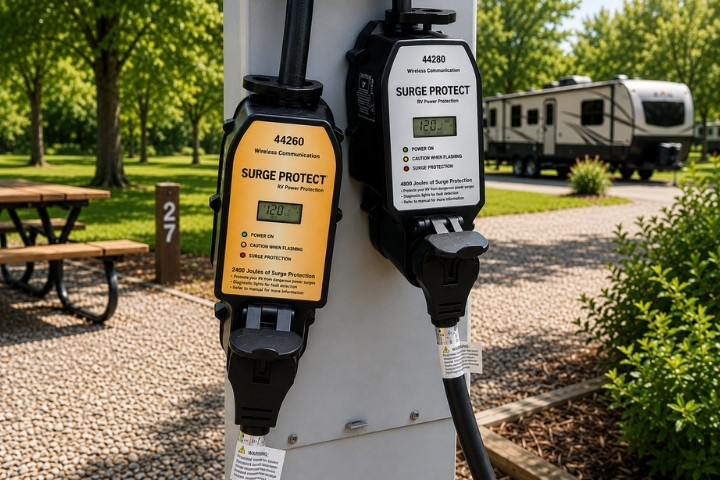
A surge protector or full electrical management system (EMS) sits between the pedestal and the trailer’s power cord and screens incoming power before it reaches the RV’s electrical system. Campground pedestals aren’t inspected as often as household outlets, and faults like reversed polarity or an open ground are common enough that RVers treat this as non-negotiable. Skip it and one bad pedestal can fry the converter or appliances in a single plug-in, often with no warning. A basic protector only catches spikes; a full EMS also checks for wiring faults and cuts power automatically. Match the amp rating, 30 or 50, to the trailer’s cord.
Dogbone Adapters, 30-Amp and 50-Amp
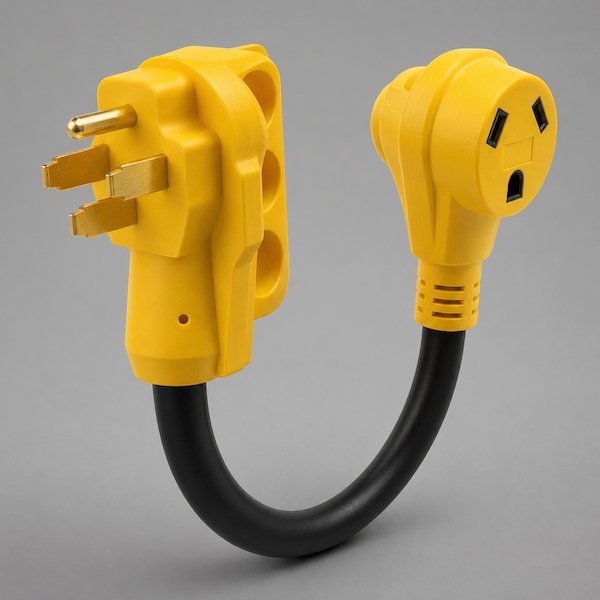
A dogbone adapter is a short, rigid cord that lets a 30-amp trailer plug into a 50-amp pedestal, or the reverse. Pedestals at a given site can be wired for either amperage, and trailers are built for one. Without an adapter, a mismatched pedestal means no power until someone finds one. A dogbone is not a surge protector, it only makes the physical connection possible, so it doesn’t replace one. Look for a rigid, weatherproof housing rated for continuous outdoor use.
RV Power Cord Plus a Heavy-Duty Outdoor-Rated Extension Cord
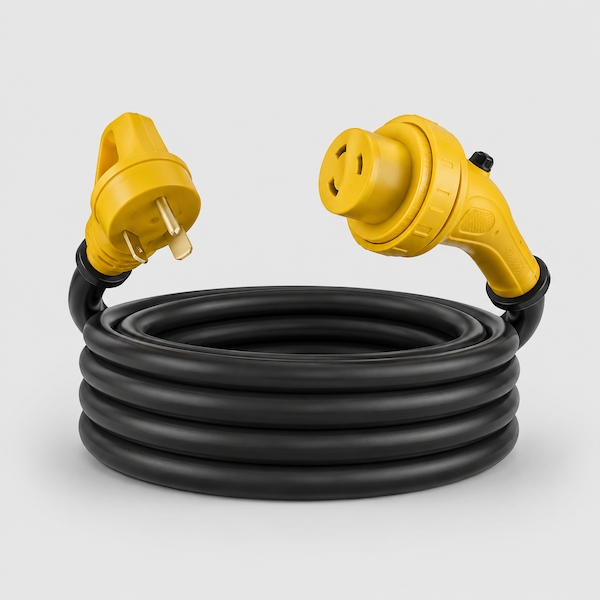
The trailer’s main cord connects to the pedestal, and a properly rated extension cord covers the gap when the pedestal sits farther away than expected. Pedestal placement varies by site while trailer cords are a fixed length. Without a backup cord, an oddly placed pedestal can leave a trailer unable to reach power at all. Match the extension cord’s amperage to the main cord, and choose heavy gauge, outdoor and wet-rated, not a standard household extension cord.
Cordless Drill With Socket Adapter
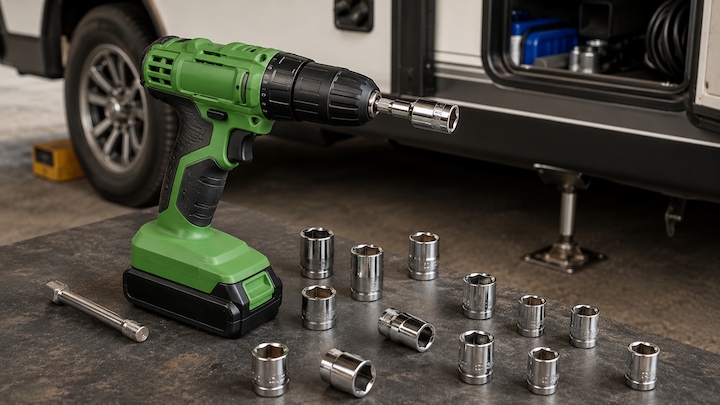
A cordless drill fitted with a socket adapter turns stabilizer jack cranking into a 30-second task instead of a manual chore. It matters most on trailers with several jacks, where hand-cranking each one adds up after a long towing day. Skip it and setup and breakdown both take longer than they need to. Look for a drill with enough torque for the jack size and a socket matched to the jack’s bolt head.
Fresh Water
Water hookup gear looks simple, but the two items that matter most here, a potable hose and a pressure regulator, protect completely different things and neither substitutes for the other.
Drinking-Water-Safe (Potable) Hose
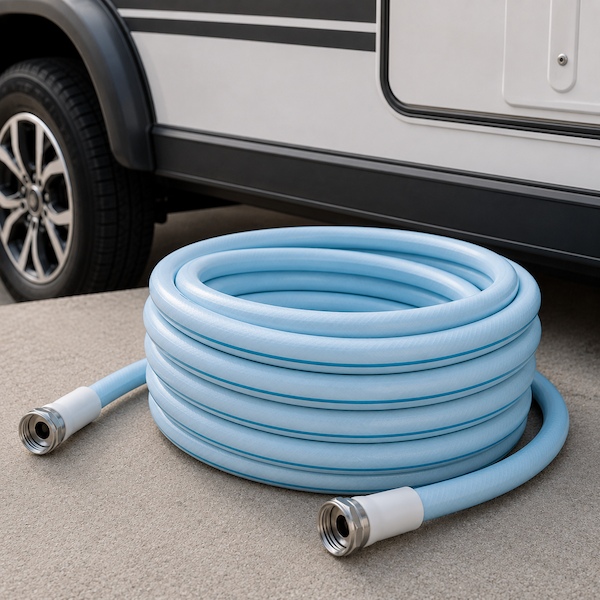
A potable water hose is made from materials rated safe for drinking water, unlike a standard garden hose. Garden hose materials and linings can leach chemicals into standing water, fine for washing a car but not for drinking or cooking. Skip it and every glass from the tap carries whatever leached out, especially after the hose sits in the sun. Look for a hose explicitly labeled drinking-water safe or NSF-rated, usually white or blue as a visual cue from utility hoses.
Water Pressure Regulator
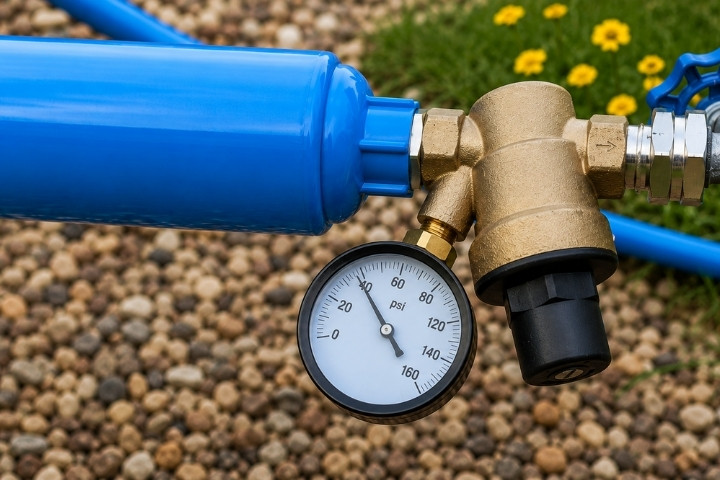
A water pressure regulator installs between the spigot and the fresh water hose and limits the pressure reaching the trailer’s plumbing. It’s the cheapest item on this list relative to the damage it prevents. Campground pressure varies site to site and can spike well above what RV plumbing is rated to handle. Skip it and a high-pressure site can blow a fitting or split a line inside the walls before anyone notices. Choose brass over plastic and adjustable over fixed, and install it at the spigot, not the trailer’s inlet.
Inline Water Filter
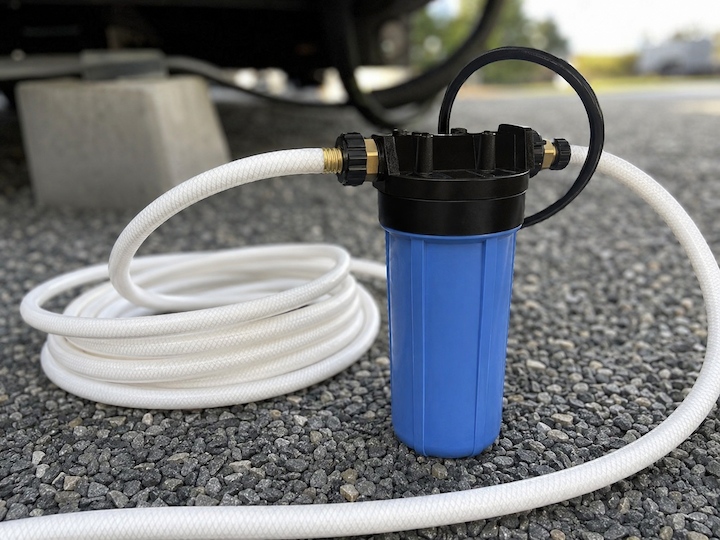
An inline water filter attaches between the hose and the trailer inlet and screens sediment and improves taste from campground water. Water quality varies a lot between parks, and sediment can work into faucet aerators and valves over time. Skip it and water may taste off or carry more sediment than the trailer’s internal filters catch. Filters have a service life, so replace on the manufacturer’s schedule rather than waiting for taste to change.
45-Degree Hose Elbow and Y-Splitter
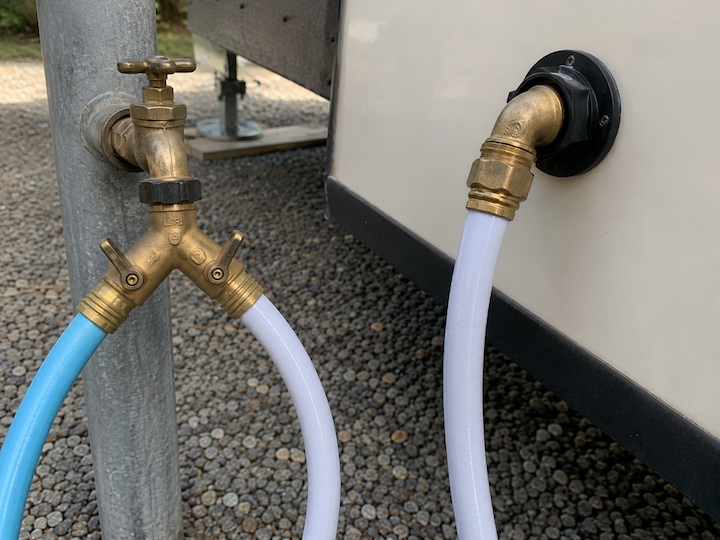
A hose elbow at the trailer’s water inlet reduces the sharp bend a straight connection creates, and a Y-splitter runs two hoses from one spigot. A hose bent tightly right at the inlet puts ongoing strain on that fitting. Skip the elbow and repeated kinking can crack it over time, an easy failure to avoid cheaply. The splitter frees up a second hose for washing without touching the drinking line. Choose brass fittings over plastic for both, they hold up better under repeated use.
Sewer and Sanitation
Sewer gear gets treated as an afterthought by a lot of new owners, but a badly set-up connection is the fastest way to create a smell and a mess that ruins a stay.
Sewer Hose Kit, 15 to 20 Feet With Locking Bayonet Fittings

A sewer hose kit connects the trailer’s waste outlet to the site’s sewer connection, with locking bayonet fittings sealing both ends. An unsecured or undersized hose can disconnect under pressure during a tank dump, exactly when you don’t want it to. Skip a properly sized kit and a too-short hose won’t reach some layouts, forcing awkward workarounds. Look for a length that comfortably reaches imperfectly positioned connections, with bayonet locking fittings on both ends rather than simple slip fittings.
Clear Elbow With 4-in-1 Dump Station Adapter
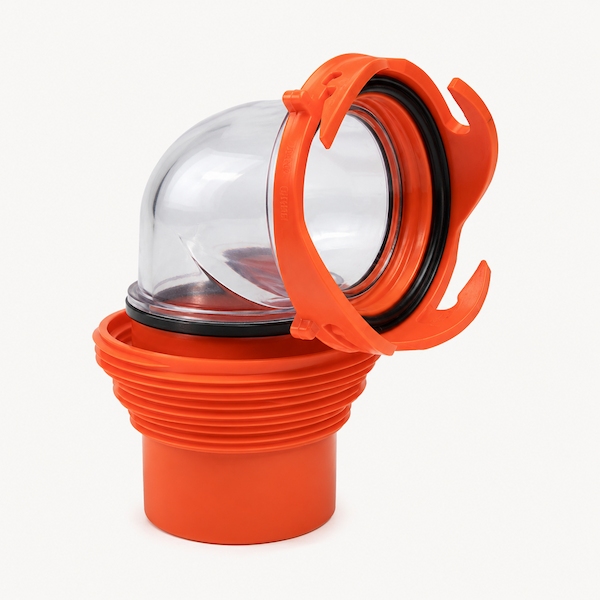
A clear elbow at the trailer connection lets you see waste flow through it, while the 4-in-1 adapter fits multiple dump station sizes. You can visually confirm a tank is actually running clear instead of guessing by how long you held the valve open. Skip it and there’s no way to know for certain a tank fully flushed, which affects odor and buildup over time. Choose durable, UV-resistant clear plastic that won’t yellow or crack quickly.
Sewer Hose Support
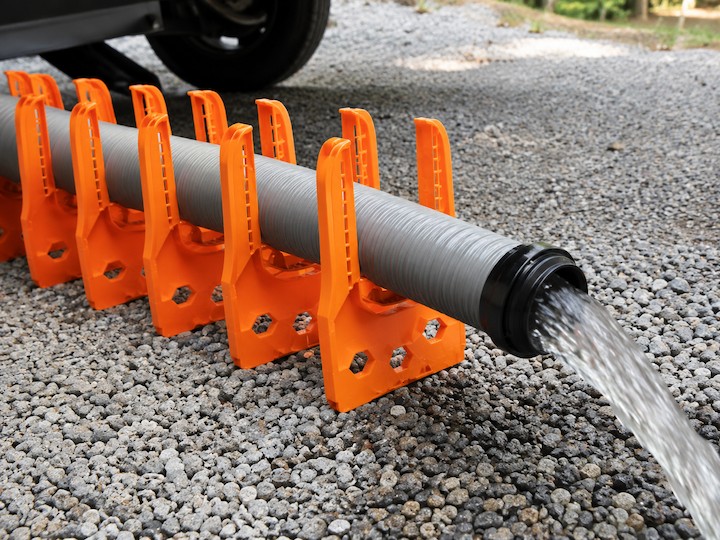
A sewer hose support holds the hose off the ground in a continuous downhill slope to the sewer connection. A hose lying flat develops low spots where waste pools instead of draining, even on a site that looks level. Skip it and pooled waste causes lingering odor and raises the odds of a clog forming in the hose itself. Look for an adjustable, segmented support that flexes to match uneven ground rather than a single rigid piece.
Disposable Nitrile Gloves
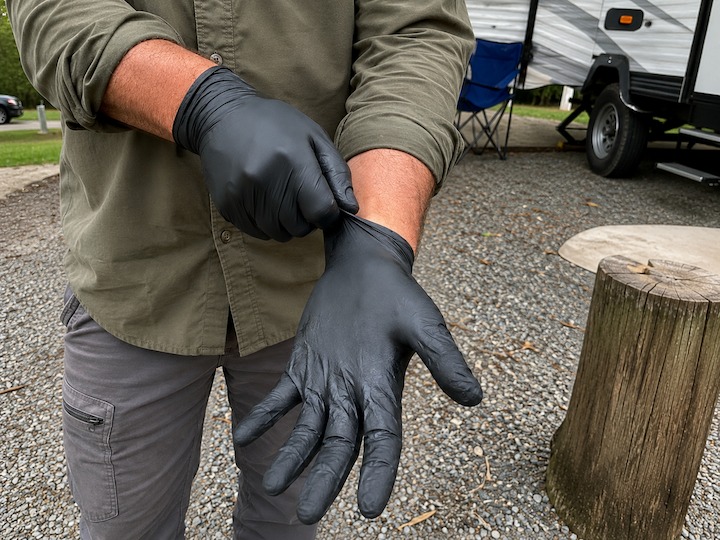
Nitrile gloves are reserved specifically for sewer connection and disconnection, kept separate from any other use. Sewer connections occasionally leak or splash during disconnection, so this is basic hygiene. Skip gloves and you’re handling a contaminated hose bare-handed for no good reason. Keep a dedicated box in the sewer bin, not shared with other tasks, and buy nitrile over latex for better chemical resistance.
RV-Safe Toilet Paper and Black Tank Treatment
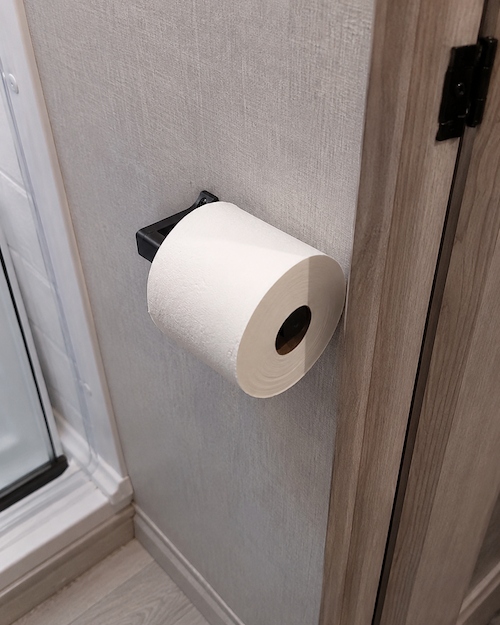
RV-safe toilet paper breaks down faster than household paper, and black tank treatment breaks down waste and controls odor between dumps. A black tank has no continuous water flow to carry solids through, unlike a home sewer line. Skip RV-safe paper and a clog becomes far more likely; skip treatment and odor and buildup get worse. Choose quick-dissolving paper labeled RV or septic safe.
Black Tank Flush Wand or Built-In Flush Connection

A flush wand or built-in connection sprays water inside the black tank after dumping to break up solids stuck to the walls and sensor. A standard dump alone often leaves residue behind, a leading cause of inaccurate level readings. Skip it and sensors reading “full” after a dump become a recurring annoyance. Regardless of equipment, keep the black valve closed between uses and only open it once the tank has enough volume to flush solids through completely.
Leveling and Stabilization
Hill Country sites are rarely perfectly flat, and this category is where uneven ground turns into real strain on the trailer’s frame and appliances if it isn’t corrected before setup.
Leveling Blocks

Leveling blocks stack under the trailer’s tires to correct a sloped or uneven site before the trailer is put into park. An unlevel trailer strains the frame over time and can keep the refrigerator, which relies on gravity for proper cooling in many RV models, from cooling well. Skip leveling and a sloped site leaves doors that don’t sit right, drawers that slide open, and appliances working harder than they should. Look for interlocking blocks rated for the trailer’s loaded weight, not just its dry weight.
Wheel Chocks
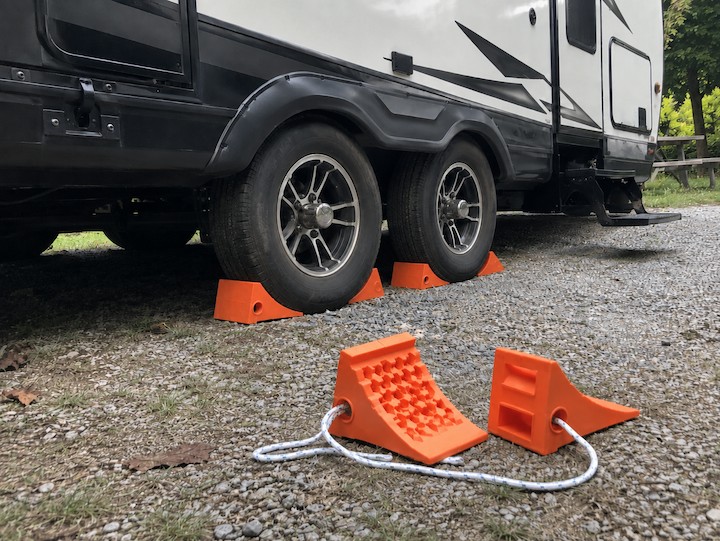
Wheel chocks wedge against the trailer’s tires, front and back, to prevent rolling once parked and disconnected. A trailer on any grade, even a slight one, can roll without chocks in place. Skip chocking both ends, not just one side, and the trailer can shift enough to strain the leveling setup. Rubber chocks hold better than plastic on heavier trailers and in wet conditions.
X-Chocks or Tire Locking Chocks
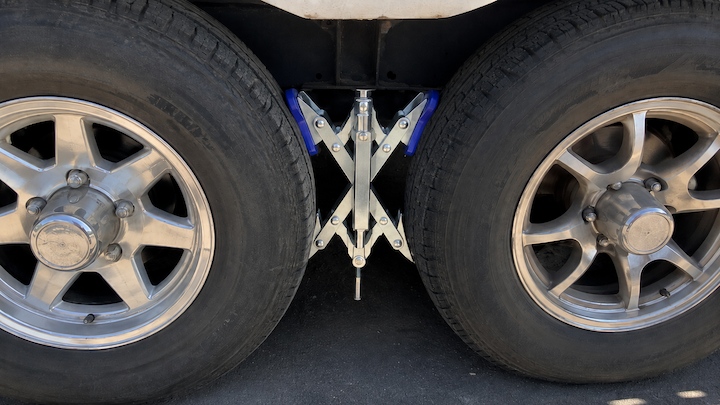
X-chocks wedge between the two tires on one side of a tandem-axle trailer, expanding to remove play between them. Tandem axles without X-chocks can rock side to side when someone moves inside, which gets old fast over a longer stay. Skip them and that rocking continues for the length of the stay. Choose a model rated for the trailer’s axle spacing and tire diameter, these come in different size ranges.
Jack Pads and Stabilizer Blocks
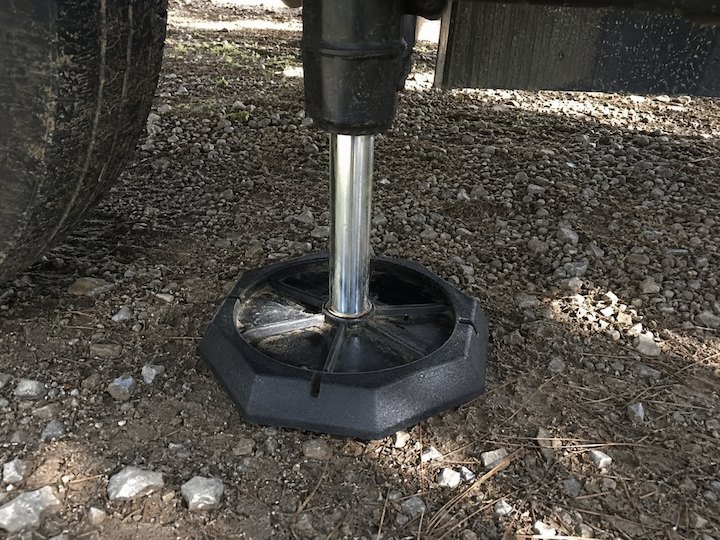
Jack pads sit under the trailer’s stabilizer jacks and spread the load across a wider surface than the jack foot alone. Gravel and soft ground common at RV sites don’t support a jack’s full point-load without spreading it out. Skip jack pads and stabilizer jacks can sink into soft ground over a stay, undoing the leveling work and stressing the jack mechanism. Look for pads sized to the jack’s foot and rated for the trailer’s weight class.
Towing and Road Safety
Trailer tire failure and towing mistakes are among the most common ways a trip goes wrong before you ever reach the site, and this gear addresses that directly.
Tire Pressure Gauge, Plus TPMS if Budget Allows
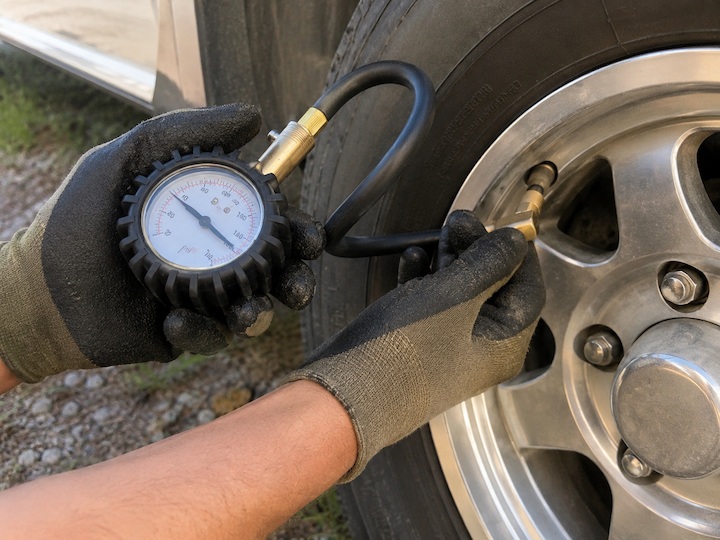
A tire pressure gauge checks trailer tire pressure before towing, and a TPMS tracks it continuously while driving. Trailer tires run at higher pressures than vehicle tires and lose air gradually with no visible sign. Skip checks and an underinflated tire can overheat and fail at highway speed, one of the most common breakdowns. A basic gauge is the tier 1 minimum; a TPMS is a worthwhile tier 2 add.
Torque Wrench and a Lug Wrench That Fits the Trailer’s Lug Nuts
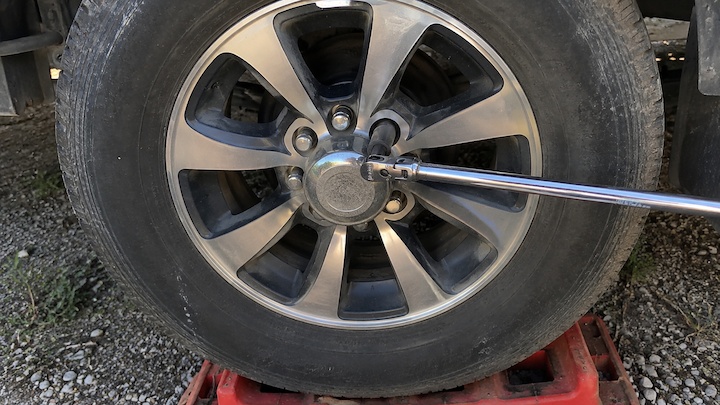
A torque wrench tightens lug nuts to the manufacturer’s spec, and the lug wrench needs to fit the trailer’s lug nuts, not the tow vehicle’s. Trailer lug nuts are often a different size, and over- or under-torquing creates real failure risk. Skip a properly fitted wrench and a roadside flat gets harder if the tow vehicle’s tools don’t fit. Check the owner’s manual for the exact spec before the first trip.
Roadside Emergency Kit
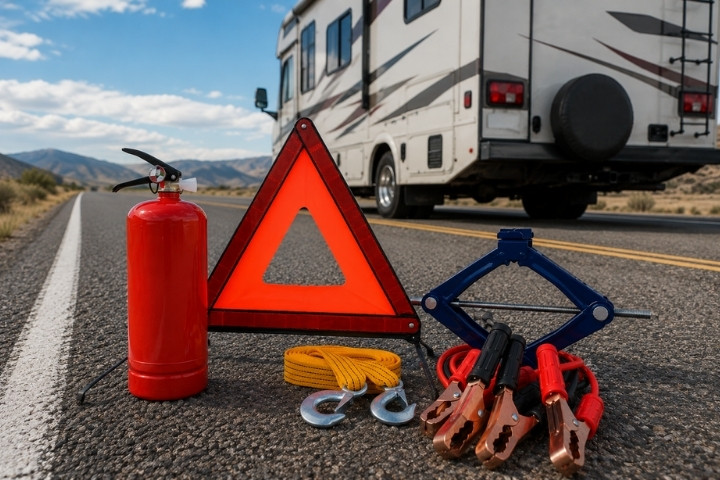
A roadside emergency kit includes jumper cables, reflective triangles, a flashlight, spare fuses, and basic tools kept accessible in the tow vehicle or trailer. Breakdowns are more common while towing, and cell service in parts of the Hill Country isn’t guaranteed. Skip a kit and a minor issue turns into a much longer delay. Keep it accessible, not buried under other gear.
Weight Distribution Hitch With Sway Control
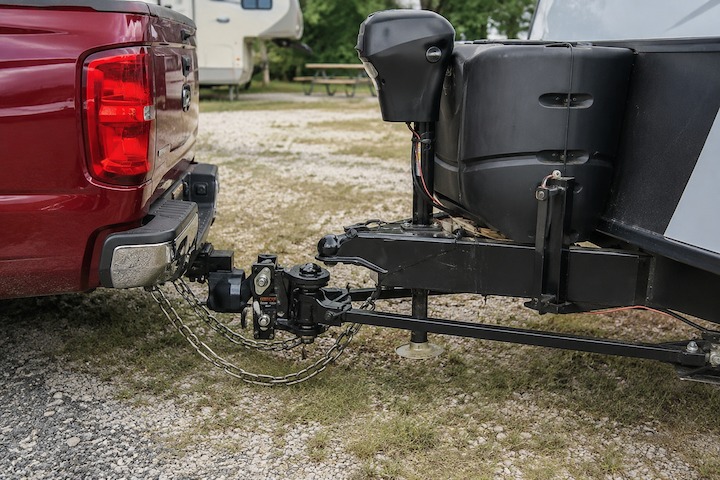
A weight distribution hitch spreads the trailer’s tongue weight across the tow vehicle’s axles instead of concentrating it at the hitch, and sway control reduces side-to-side movement at highway speed. Whether this is needed depends entirely on the specific trailer and tow vehicle combination and the hitch already in use, so it isn’t universal like a surge protector. Skip evaluating it when it’s actually needed and a mismatched combination can experience dangerous highway sway. Have the combination assessed by a hitch specialist rather than assuming a lighter trailer doesn’t need one.
Site Setup and Outdoor Living
Nothing in this category affects whether the trailer functions safely. It’s fine to wait on all of it until the basics above are covered.
Outdoor Rug or Patio Mat
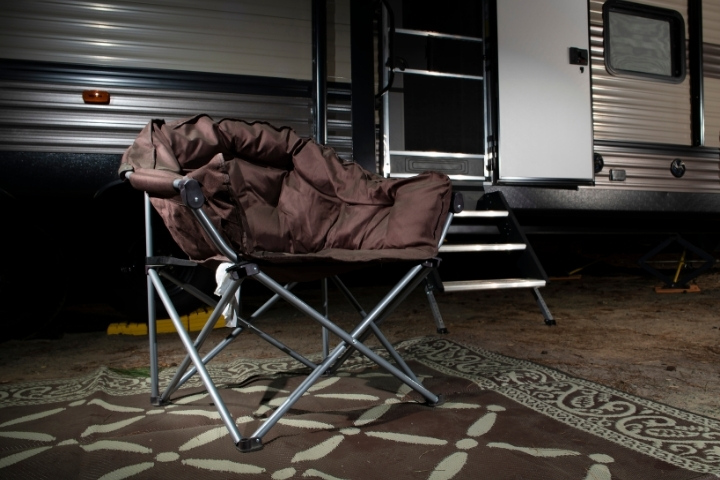
An outdoor rug at the trailer’s entry step catches dirt and gravel before it gets tracked inside. It matters on gravel sites, where dirt tracked in daily adds up to real interior cleaning. Skip one and expect to sweep more often, nothing worse than that. Look for a mat that dries quickly and rolls up small for storage.
Camp Chairs, Folding Table, and Exterior String or Step Lighting

Camp chairs and a folding table create usable outdoor living space, and string or step lighting adds visibility after dark. This is what makes a site comfortable to spend time outside the trailer. Skip these and camp life is functional but less pleasant in the evening. Choose lightweight, collapsible furniture that fits realistic storage, and battery or solar lighting instead of pedestal power.
Portable Grill and Collapsible Outdoor Trash Container

A portable grill moves cooking outside the trailer, and a collapsible trash container keeps site trash contained and off the ground. This keeps cooking smells and mess out of a small interior and keeps wildlife away from exposed trash. Skip a secure container and loose trash can attract animals overnight. Choose a grill sized for realistic storage space and a trash container with a sealing lid, not an open top.
Safety and Organization (Non-Negotiable Regardless of Tier)
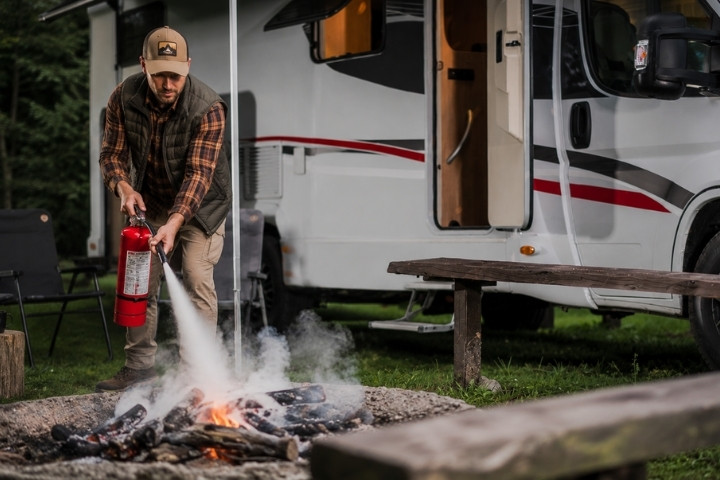
A few items don’t fit the tier system because they’re baseline safety and organization, not hookups or comfort: a fire extinguisher rated for the trailer’s size, a basic first aid kit, an LED headlamp for hands-free work in the dark, and labeled storage bins that physically keep fresh water gear away from sewer gear at all times. A hose or fitting that’s touched sewer connections should never end up in the same bin as anything that touches drinking water.
Getting It Right at the Pedestal: The Arrival Sequence
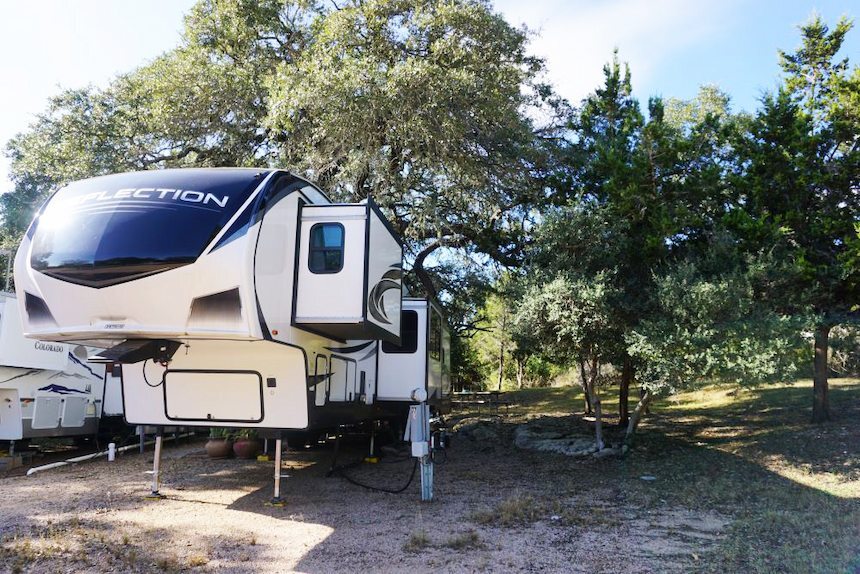
On Miller Creek’s pull-through sites, the pedestal sits toward the rear of the pad, so a standard 25-ft power cord reaches most rigs without an extension, worth confirming before you buy one. Sites here run full hookups (water, electric, sewer) with 20/30/50 amp service, so the gear above gets used in a set order the moment you pull in: chock the wheels, level the trailer, then plug in the surge protector or EMS before connecting power at all. Only after power is confirmed safe should the pressure regulator go on at the spigot, followed by the potable hose. Sewer connects last, hose on its support, sloped continuously downhill to the connection. Follow that order and you’ll never troubleshoot a connection with the trailer already half hooked up. Review current site types and rates on the Miller Creek RV sites and rates page before your stay.
Where Does All This Gear Actually Go?
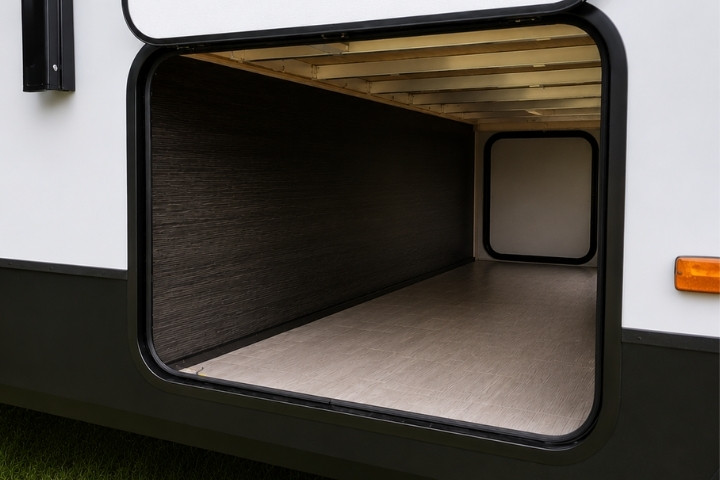
Pass-through storage is the constraint most owners hit after their first season, not before it. A small trailer’s pass-through bay fills up fast once tanks, hoses, and leveling gear all compete for the same space.
The most useful habit is physical separation by function. Keep fresh-water gear (hose, regulator, filter) in one labeled bin; keep sewer gear (hose, support, gloves, adapters) in a completely separate bin,. the two should never share a compartment.
Bulkier, less frequently used items (like hitch components, a spare tire, and the roadside kit) are often better suited to the tow vehicle than fighting for space in the trailer. Save trailer storage for what you need at every site: the arrival sequence gear.
Frequently Asked Questions
What accessories does a travel trailer actually require versus what’s optional?
Tier 1 items (electrical protection, a pressure regulator, potable hose, sewer gear, leveling blocks and chocks, and basic road safety tools) are required in the sense you can’t safely hook up or tow without them. Tier 2 and 3 add protection and comfort, but nothing fails without them.
What doesn’t come with a new travel trailer from the dealer?
Dealers hand over the trailer with hookup cords already built in, but surge protection, a pressure regulator, sewer hose kits, leveling gear, and road safety tools are almost never included and need to be bought separately.
Do I need both a surge protector and a water pressure regulator?
Yes. They protect different systems, electrical and plumbing, and neither substitutes for the other. Skipping either leaves that system unprotected regardless of how well covered the other one is.
What’s the difference between a surge protector and an EMS?
A basic surge protector only catches voltage spikes. A full electrical management system (EMS) also checks for wiring faults like reversed polarity or an open ground and cuts power automatically, which a basic surge protector can’t do.
What is a dogbone adapter and when do I need one?
A dogbone adapter is a short, rigid cord that lets a trailer’s cord plug into a pedestal wired for a different amperage, most commonly 30-amp into a 50-amp pedestal or the reverse. You need one anytime the site’s amperage doesn’t match the trailer’s cord.
Why can’t I use a regular garden hose?
Garden hoses aren’t rated for drinking water and can leach chemicals into water sitting inside them, especially after sitting in the sun. A potable, drinking-water-safe hose uses different materials specifically to avoid that.
Do I need a sewer hose support if the site already has a sewer connection?
Yes. A sewer connection doesn’t guarantee the ground between it and the trailer is level. A hose lying flat on uneven ground develops low spots where waste pools, causing odor and clog risk regardless of how the connection is positioned.
Where do I store all of this in a small trailer?
Separate fresh water and sewer gear into their own labeled bins that never share space, and keep bulkier items, like a weight distribution hitch or spare parts, in the tow vehicle instead of competing for pass-through storage.
Plan Your Next Hookup at Miller Creek
Once your gear list is squared away, the next step is picking a base that makes hookup day easy. Full-hookup pull-through and back-in sites are waiting at Miller Creek RV Park, a quiet Hill Country home base for your next trip.